There is a very old and correct saying that goes on to say that a coin has two sides. Like a coin almost every aspect of life has two sides. For example the most common example can be taken of the advent of technology and the crime associated with it. With the advent of time and technology, computers have formed an integral part of the working society. Computers along with them have brought greater work and time efficiency in the working circle of the society as a whole. But there comes the twist. Along with all the benefits that computers and technology have brought, there also comes the rising and alarming threat of cyber crime.
Cyber crime in recent times has been credited along with a lot of attention by the general public, thanks to the almost impossible crimes committed by the hackers. The dangers that cyber crime is posing to computers and information in computers has been acknowledged by almost all the countries. Serious concern and alarm have been raised against the growing threat of cyber crime and its potential threat to the information possessed in the computers. The reason that cyber crime is posing a serious threat, is because of the reason that most countries around the world have no existing law that they can exert against cyber crimes. This leaves the businessmen and their business at the mere mercy of the technology that is being used by the businessmen in their business.
The only resort that the individuals have or can take against cyber crime is the way of self protection. Although self protection is the one step that people can take against cyber crimes, but still unfortunately it’s not a full proof safe step. As hackers can easily hack through the computers of others, this makes the information stored in the computer more vulnerable to information leakage. One main reason why cyber crime has been gathering so much of attention, is because of the fact that cyber crime has no boundaries of working or occurring. Cyber crime have been reportedly breaching national barriers at ease there by jeopardizing the political and the defense strategies of the country in front of the other nations, as it has been reported that after committing the crime the hackers sell the leaked information to the rival countries for money.
The other reason as to why cyber crime is posing a serious threat is because of the fact that it is usually very hard to track the hackers as they operate together but from far and different places, making it harder for the law enforcers to track and find them. These hackers usually operate from different and far off places, sometimes even different countries making it almost impossible for anyone to track them.
Thus national bodies and governments should operate together to make a legal framework and structure through which no hackers can slip through after committing cyber crime.
Posted on 23.59 / 0
comments / Read More


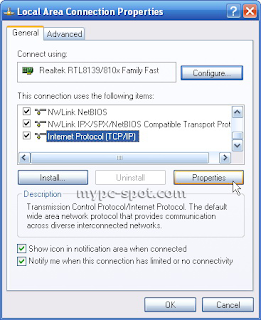
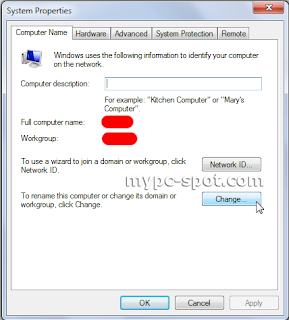
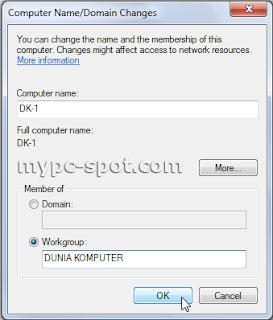
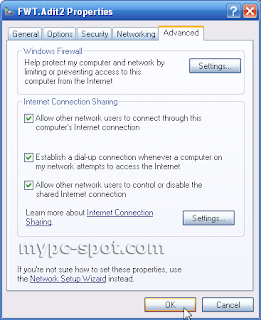
 Sudah lama juga ya